How to create your own Heroku alternative on DigitalOcean

I was checking my mail on 25th August 2022, and then suddenly, I saw an email announcement from Heroku. I thought it might be some weekly newsletter, then later found out that they are shutting off the free tier.
My First reaction was like
WHAAAAAAAT??

Hear me out Heroku is a for-profit company, and There's nothing we can do but accept that they are here to make money like most of us, and we should respect that decision.
But I loved Heroku and can't imagine using something else for deploying small apps. So now I am gonna build my own Heroku with open source resources and a server. So let's jump into it.
What are we going to build?
We will be building a PaaS (Platform as a Service) and hosting it on cloud service. We can use any cloud provider you like, but in this tutorial, I'll demonstrate on DigitalOcean and AWS.
Build Heroku alternative on Digital Ocean
There are two methods by which we can install Dokku on DigitalOcean
- DigitalOcean app marketplace
- Manually on bear metal
Since this section is dedicated only to the digital ocean, We will be using Marketplace to install dokku on our DO instance.
Note: The Manual Installation of Dokku will be the same for all the cloud or VPS service providers, so we will cover this in the AWS Post.
Step by step process
In order to follow along with this process, you need to have a digital ocean account.
So if you don't have one create one.
Step 1: Go to create a Droplet option.
Step 2: Choose Marketplace from the tab and search for dokku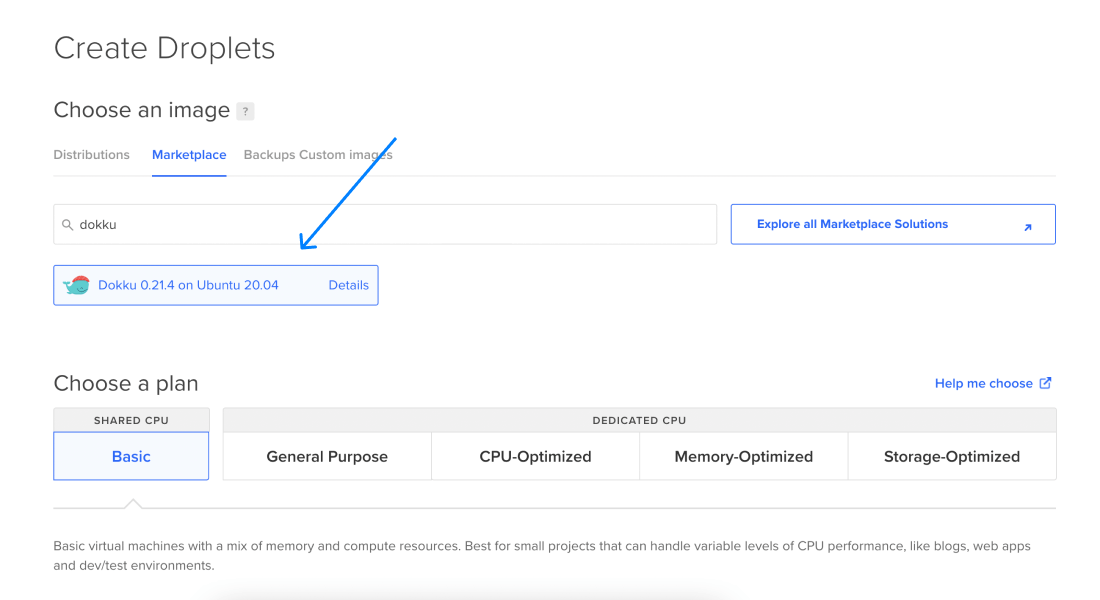
Step 3: Select a Plan. My recommendation would be to take a plan that has at least 2GB of ram memory.
Step 4: Configure the other options, such as Datacenter region, Authentication, and Droplet name.
Step 5: Hit the Create Droplet button.
It will probably take a minute to spin up the droplet. Once that is done, visit the droplet IP address in a browser.
Configure Dokku
In the first field, paste your Public SSH Keys. If you don't know how to create a, then follow this and create one.
The second field requires your domain name, so enter your domain name here, and later you have to add an 'A' record to that domain.
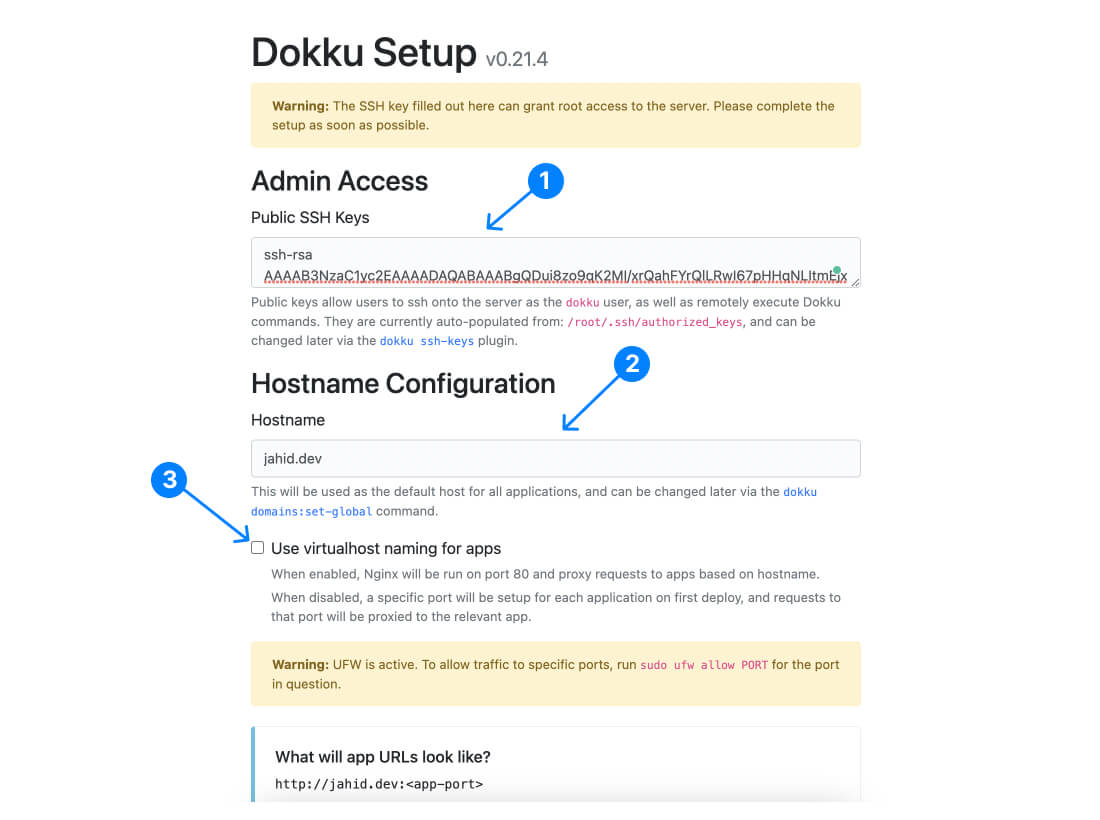
Check the Use virtualhost naming for apps' Option it will give you a subdomain like Heroku. For instance, if your app name is blogand your hostname isfoxflue.com,then it will create a subdomainblog.foxflue.com` automatically.
Click on finish setup.
Our Dokku Setup is now complete.
Deploy application to Dokku with Git
Ok, If you have come this far means you deserve some applause. So here you go.
To deploy anything on dokku, we need to get into ssh. So open your terminal, and let's turn on hacker mode😎.
ssh root@YOUR_DO_IP
No, once you are in the DO instance, you can run Dokku commands. Dokku has all the options to configure, create, and manage your app instances. I can discuss all this in one post, so when you have time, go visit their documentation. It's pretty neat.
So to create an app in Dokku you run the following command.
dokku apps:create YOUR_APP_NAME
Once the app is created, it acts as a git host where you can push code from a local machine.
In your local project directory,
Initialize Git
Then add dokku as a remote host by using the following command.
git remote add dokku dokku@YOUR_HOST_NAME:YOUR_APP_NAME
Here YOUR_HOST_NAME is your domain name which you had set up at the very beginning.
Now you can push the code into it.
git push dokku master
Now Dokku will install all the dependencies from your package.json and make the app live.
You can access the app on
YOUR_APP_NAME.YOUR_HOST_NAME
That's it now you have your own Heroku, and the best part is you have more control over it.
If you are stuck, I am reachable at @JahidDev on Twitter.